An Object Manager is a style of writing code, where Objects are managed within the code. One of the most effective ways to do this is by using a Singleton class with the Object Manager (I would recommend you read the “Singleton” tutorial, if needed). What this means, is that you have one instance of a Manager, that creates and updates the objects as needed. You will need to learn this technique in order to understand some of your textbooks in class.
To start off we will need to create a Base object that can be considered as clay for your model. After creating a Base class, you can branch off into as many classes as you want. For each branch of class you add, you will need to create a “create” method in your ObjectManager class. This can be confusing, so using the same example as before, I will add an ObjectManager.

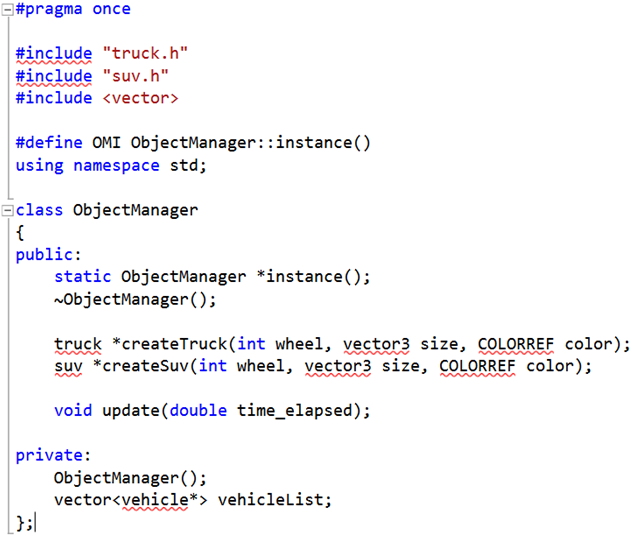
Ignore the red marks, this was written as an example code. Anyways, as you can see, we have two methods to create each of our branch objects and also a update method. If you look near the bottom of the code, you can see the “vector<vehicle*> vehicleList;” This is the most important code, this is what holds and organizes your objects. The reason we put the base object instead of the branch object, is because using the base object we can push_back the branch objects and organize them in one vector.
Vector Code to Know:
Vector.push_back(object); //this adds the object to your vector array and adds it to the end of the stack
Vector.pop_back(object); //this also adds the object, but instead this time, the object is added at the front of the stack (So if you were going to use a iterator. The last one added will be the first one called)
//next we have an example of how to use an iterator in a ForLoop
For(vector<base*>::iterator I = vBaseList.begin(); I < vBaseList.end(); i++)
{
(*i)->getWheel();
}
You can look up further vector code on the internet, but this should be enough to get you started. Now there is one last thing to do and that is finishing the .cpp file. I will write an example for creating a object and adding it to the vector. I will let you figure out how to combine the ForLoop and other code for the Update function.
truck* ObjectManager::createTruck(int wheel, vector3 size, COLORREF color)
{
//use a get id functions here. Probably best to grab this from your graphics engine
truck *tempTruck = new truck(id);
//you can now assign whatever you need to assign in the base class
tempTruck->setWheel(wheel);
tempTruck->setSize(size);
tempTruck->setColor(color);
//then if you would like to use this space to create your graphics object, this would be a great place
//finally you just have to push_back your new object into the vector
vehicleList.push_back(tempTruck);
return tempTruck;
}
I hope this tutorial helped you get started and will hopefully help you understand what your doing a little bit more. Once you have mastered this, then you can move up to a slightly more complicated factory code and abstract factory code.