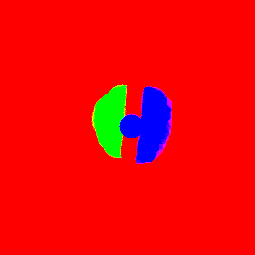
Terrain texture painting is when your painting a terrain with a specified texture. The way this works is that there is one blend texture and then three terrain textures. The blend texture is sampled by the shader in order to determine the correct texture to apply at this location.
To get started with the basics of muti-texturing I recommend reading chapter 11.8 in Frank D. Luna’s Introduction To 3D Game Programming With DirectX 9.0c A Shader Approach. This book is definitely one of my favorite Graphics Programming books.
Creating The Blend Texture
The first thing you have to do is create the custom blending texture. For my Terrain Editor I allowed the user to specify the detail that they want to use for the texture. I then determined the width and height of the texture by multiplying the width and length of the terrain by the user specified scale. The default scale of 1 would produce 1 blend texture pixel to define 1 unit in the 3D space.
Like the terrain mesh, since we are editing the texture we can not use a managed memory pool. This means we will want to store a copy of the texture locally. The way I did this is to just create a list of D3DXCOLOR values of the same amount of pixels as in the texture.
Editing The Blend Texture
One of the first questions I was asking when starting this project was “How do I edit the texture?” After some research I learned that you can edit a DirectX texture by calling the LockRect() function before the edit and UnlockRect() after the edit.
The next question I was asking was “What is the data type stored in this rectangle buffer?” Again some research into some forums proved to be useful as I learned that it was an array of bytes and that you would need to index these bytes in order to edit the correct pixel that you wish to edit. The equation for getting the index of a pixel is:
Index = (Y Position) * (LockedRect.Pitch / 4) + X Position
To start off I iterated through the entire texture setting each index to D3DXCOLOR(1.0, 0.0, 0.0, 1.0). This set all the colors to a solid red, which represented the first texture of my three textures. Green was reference to my second texture and blue was a reference to my third texture. Using the RGB of my blend texture I can determine the texture to use at the specified position where that blend texture pixel is located.
Converting World Coordinates to Texture Coordinates
One of the larger hurdles to get over was converting a 3D World Position into a 2D Texture Position. To start since the texture coordinates are in relation to the terrain I have to move the world coordinate over by the same amount that I initially move the starting terrain vertex coordinate over by.
World Coordinate X = World Coordinate X + (Terrain Width) * 0.5
World Coordinate Z = -(World Coordinate Z – (Terrain Length) * 0.5)
Next, scale the terrain coordinate by the user defined texture detail scale value. Finally, for DirectX9 the texture will need to be offset by half a pixel down each negative axis.
World Coordinate X = World Coordinate X – (Blend Texture Scale) * 0.5
World Coordinate Z = World Coordinate Z – (Blend Texture Scale) * 0.5
The resulting X and Z 3D Coordinate is your X and Y 2D Texture position. I implemented and recommend implementing a rounding function to round the 3D decimal coordinate to its proper 2D texture position.
